|
 |
 |
 |  |
 |
 |
|||||

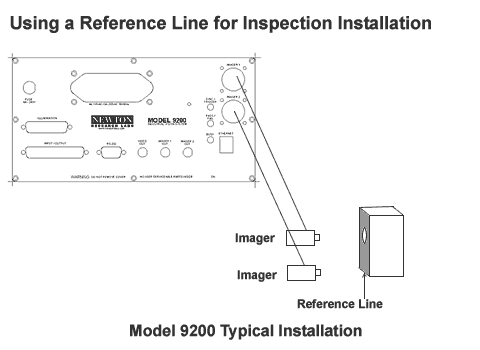
| Another common application for dual simultaneous inspection from two Imagers is when one Imager is used as a reference for the other Imager to base its inspections. In the diagram above the bottom Imager is using the line on the "box" as a reference in which to base a "Y" location measurement of the inspection area above (the image area of the top Imager). The bottom Imager, combined with the reference line in this example, also acts as a means to account for any tilt or skewing of the object on the assembly line to assure accurate inspection results of the top Imager. (Also see two sides & or go back to Dual Simultaneous Installation) |
Typical Area Scan Installations
Typical Line Scan Installations
Copyright © 2001 Newton Research Labs, Inc. All rights reserved.
